How we made Heavy Metal Fairy Tales...
For this book, we used aluminum that was etched with a metal finish. If you would like more information on attempting such a thing, we can provide it. However, it is extremely toxic and if you don't have a large work area then we would strongly discourage the process.
Still, no matter the cover, it should be completed before the interior gets any further along. Make sure that it is larger than the folded page (you don't want them sticking beyond the cover) and that it is of a stronger stock than the interior pages for both aesthetics and the practicality of having a strong exterior for it all to adhere to...


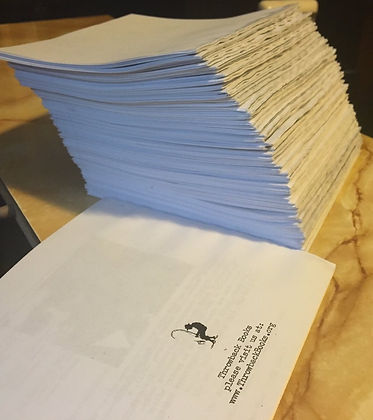
The first step is getting the printed pages folded. This can be done while drinking--- Netflix binging is also great for this process. Friends can help this process if you have competent friends. After they are printed and cut down to size (pages, not friends), the folding is mindless and fun.
Then there is the glue. It is VERY important that you use paper glue for this process as no other adhesive will bend without breaking and paper needs to bend when it is being read. After being glued, wrap them in plastic (we use torn apart sandwich bags) and put them under something heavy. A desk or a bookshelf. All of this is needed to decrease the wrinkling of the glued edge but-- as you can see in the picture to the left --this will happen no matter what.
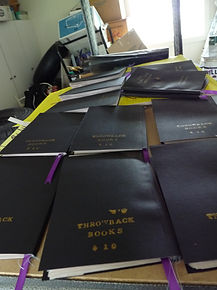
Leave them pressed for a few hours but they will not completely dry in the plastic so they will need to be aired out. Have a large surface ready to set them on. A surface large enough so you don't stack them together and let them become glued into one uber-large book.
We also find it important to have an interior front/back page consisting of a superior cardstock for two reasons:
1. It looks good to open a book and have that page there.
2. The pages can be glued to this wrap-around page easily and it absorbs any extra glue/moisture that would otherwise make the spine of the cover warp.
Just like the individual pages, it is important for these to be pressed under something heavy as well. However, unlike the other pages, there should be no glue schlepping over the edge so there is no reason to wrap it in plastic for this step.
Again, it is important to use paper glue for this step as well. Every aspect of the book will bend and be abused if read properly so it is important to allow it to do so without cracking. There are many glues out there (rabbit-skin glue might be the best but, moralistic issues aside, it smells horrible...) but we use the cheap Elmer's Craft Bond--- something that can be found where ever scrapbooking supplies are sold. After a few hours, bring the glued pages into the air to breathe. It may take up to twelve hours for the moisture to leave the paper. Don't try to adhere it to the cover until it is completely dry.
For this book, we had to use a metal epoxy to glue the pages to the cover. However, no matter the materials you choose, the steps are as easy as having variations on the folded materiales to the left and glueing them all together at differing times.
How we made Blue Life Sketches...

For the first time, we stitched the binding of this book in order to get the crinkly feel of the pages we wanted to emulate the paper you would find in a motel nightstand Bible.
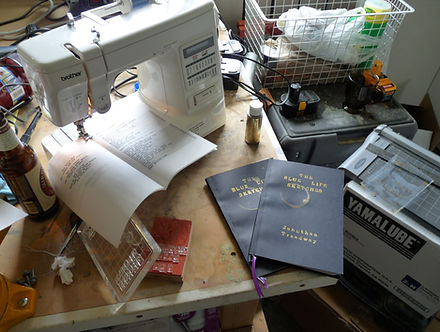
To begin, four pages of text were printed on 1-side of an 11"x 17" sheet of vellum--- then folded like a +, top to bottom, left to right. Those translucent pages were held together at the top but they were too transparent to read, so a piece of newsprint was placed between each to provide contrast. Then they were sewn together as seen to the left, some with blue thread and some with purple left to dangle from the bottom of each book for authenticity. Afterwards, they were all glued and pressed (these under random workbenches) just like all the rest of our books (see above).
The purple bookmark is lace purchased at any craft shop, dovetailed with scissors and glued when the bound pages are sealed to the black interior. These are pressed again, then glued into the cover. Again: cannot be stressed enough that paper glue must be used. Any other glue will not be malleable and will crack instead of bend. We have books made nearly a decade ago that are still holding together perfectly and it is because of way they can bend reather than break. Yamalube was not used in making this book.
Then, the covers need to be completed. The stamps used for the gold lettering can be seen at the bottom of the picture. The Mirror Pond beer bottle can be seen to the left--- it was used to get drunk. Then it was used to stamp the drink ring onto the cover (accomplished with a mixture of water, beer and bleach).
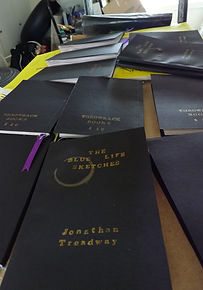
Then the interior is glued to the dried cover--- and, yes, again pressed under anything heavy. Stacks of books and portable typewriters still in their cases work best for us but there is no correct way. Just place them under something flat and heavy.
It really is that easy to have a beautiful book that, we believe, will last for generations.
